


Introduction
Creating a bootable macOS USB drive can be useful when you need to install macOS, repair a Mac, troubleshoot startup problems, or keep an installation medium available for future use. Although modern operating systems provide convenient recovery options, having a properly prepared USB installer can still be valuable in situations where internet recovery is unavailable or a system needs a fresh installation. The process requires more than simply copying macOS files to a USB flash drive because the storage device must be prepared in a format and structure that the target Mac can recognize during startup.
Windows users who need to work with Mac-oriented storage media may look for specialized utilities that provide access to Apple file-system environments. gettransmac.com is associated with information and resources surrounding TransMac, a Windows-based utility designed for working with Mac disks and disk images. Understanding how such software fits into the bootable USB process can make the overall procedure easier to follow, particularly for users who do not have access to a second working Mac.
The important point is that creating a bootable installer involves several stages, including obtaining a legitimate macOS installer image, selecting an appropriate USB drive, preparing the drive correctly, writing the image or installer data, and testing the finished media. Each stage can affect the final result. A mistake in disk selection or formatting, for example, can cause data loss or produce a USB drive that does not boot.
Understanding Bootable macOS USB Drives
A bootable macOS USB drive is a removable storage device containing the necessary installer environment and file structure required to start a compatible Mac and begin an operating-system installation or recovery process. It is different from an ordinary USB drive containing copied macOS files. The device must be prepared in a way that the Mac’s startup firmware and installation environment can recognize.
The usefulness of a bootable USB becomes especially apparent when a Mac cannot start normally. A user may need to reinstall the operating system after replacing a storage drive, troubleshoot a damaged installation, or perform a clean installation. In such situations, having installation media ready can reduce dependence on an existing operating system. However, compatibility matters because different Mac generations and macOS releases can have different startup, security, and hardware requirements.
When working from Windows, the process can appear more complicated because macOS uses file systems and installer structures that are not normally handled by standard Windows tools. This is where specialized disk-image utilities can become relevant. gettransmac.com can be considered as a starting point for understanding how TransMac-related workflows can be used when Mac storage media needs to be prepared or accessed from a Windows environment.
Why Use Windows to Prepare a macOS USB?
Many people assume that a macOS installer must always be created from another Mac. In practice, users sometimes have only a Windows computer available when they need to prepare Mac-related storage media. This can happen when a Mac has stopped booting, a replacement computer has not yet arrived, or someone is helping another Mac user remotely or from a different location.
Windows does not natively provide the same collection of macOS installation utilities available on macOS itself. Therefore, specialized applications can provide an alternative method for writing compatible disk images to removable media. The goal is not to make Windows behave like macOS but to provide the necessary disk-writing functionality for the particular image and hardware configuration being used.
Before beginning, users should verify the macOS version they intend to install and the compatibility of the target Mac. A USB installer created successfully does not automatically mean that every Mac can boot from it. Hardware generation, supported macOS versions, startup security settings, and the type of installer media can all influence the result.
Preparing the USB Drive
Choosing the right USB drive is one of the simplest but most important parts of the process. A reliable USB flash drive with enough storage capacity should be selected based on the size and requirements of the installer being created. The drive should also be backed up before use because preparing bootable media can erase its existing contents.
USB drives are frequently used for temporary file transfers, photographs, documents, and other personal data. If the same drive is selected for a bootable installer, those files may be removed during formatting or image writing. Users should therefore copy anything important to another location before proceeding.
The quality of the drive can also affect the experience. A low-quality or damaged flash drive may cause writing errors, corrupted installation media, or intermittent boot failures. If a USB creation process repeatedly fails despite correct settings, testing another known-good drive can help determine whether the storage device itself is responsible.
Basic Preparation Checklist
Before writing the installer, it is useful to confirm the following:
- The USB drive contains no important files.
- The drive has sufficient storage capacity.
- The target Mac supports the intended macOS version.
- The installer image has been obtained from a trustworthy source.
- The Windows computer has sufficient permissions and available storage.
How Gettransmac.com Fits Into the Process
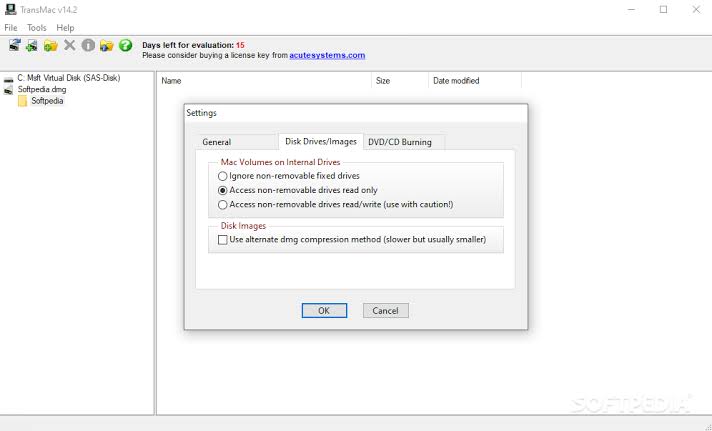
gettransmac.com can be useful for users researching the TransMac approach to handling Mac-compatible disk images from Windows. TransMac is generally associated with accessing, reading, writing, and managing Mac disks and disk images from a Windows environment. For bootable-media tasks, the relevant concept is writing an appropriate image or installer structure to a USB drive rather than simply dragging files from one folder to another.
The exact workflow can depend on the type of installer image available and the macOS version involved. Users should therefore treat the application as one component of the process rather than assuming that a single click will create a universally bootable installer for every Mac. The target hardware and installer format still need to be considered.
When using gettransmac.com as a reference point for TransMac-related information, users should also pay attention to software version compatibility and instructions applicable to their particular setup. Disk utilities operate at a low level, so selecting the wrong physical disk can have serious consequences. Carefully checking the drive name and capacity before confirming an operation is an important precaution.
Writing the macOS Image to USB
Once the appropriate USB drive and installer image have been prepared, the next stage is writing the required data to the removable disk. Disk-image writing is different from ordinary file copying. The utility may need to reproduce a particular disk structure, partition information, and boot-related data so that the resulting device can be recognized correctly.
This stage can take some time depending on the USB interface, flash-drive speed, computer performance, and size of the image. Users should avoid interrupting the process while data is being written. Removing the USB drive prematurely or closing the utility during an active operation can result in incomplete media.
A successful write operation is encouraging, but it should not automatically be treated as proof that the USB will boot every Mac. The final test should be performed on compatible hardware whenever possible. If the Mac does not recognize the device, the issue could involve the installer itself, USB formatting, startup settings, hardware compatibility, or the particular Mac model.
Understanding the Main Process
The overall workflow can be summarized without turning the task into a complicated technical procedure. First, identify the Mac model and determine which macOS versions it supports. Next, obtain the appropriate installer or disk image from a legitimate source. Then prepare a suitable USB drive and make sure all important data has been backed up. After that, use the selected Windows disk utility to write the required image or installer data to the USB.
| Stage | Main Purpose | Important Consideration |
|---|---|---|
| Compatibility check | Identify a supported macOS version | Mac model and hardware support |
| USB preparation | Provide suitable removable storage | Existing data may be erased |
| Installer preparation | Obtain the required macOS installation media | Use a trustworthy source |
| Image writing | Transfer the required structure to USB | Select the correct physical drive |
| Boot testing | Confirm the Mac recognizes the media | Startup settings may affect detection |
This staged approach makes troubleshooting easier because each part can be checked independently. If the USB cannot be created, the issue may be with the image, drive, permissions, or writing process. If creation completes but the Mac does not boot from it, attention should shift toward hardware compatibility and startup configuration rather than immediately repeating the same writing process.
Common Problems When Creating macOS USB Media
One common problem is insufficient USB capacity. Although the installer itself may appear manageable, additional space can be required depending on the method and image being used. Another issue is an unreliable flash drive. A USB drive can appear normal during everyday file transfers while still producing errors during a large sequential write operation.
Another frequent source of confusion is the difference between an installer application, a disk image, and an already prepared bootable disk. These are not necessarily interchangeable. The correct method depends on the format of the source media. Trying to write an incompatible file as though it were a complete disk image may result in a USB that contains data but cannot boot.
Users may also encounter permission-related problems on Windows. Disk-writing operations require access to physical storage devices, and security software or user-account restrictions can sometimes interfere. Restarting the application with appropriate permissions, checking that the USB drive is correctly connected, and ensuring that no other program is actively using the device can help isolate such issues.
Troubleshooting Boot Problems
If the finished USB does not appear during startup, first verify that the target Mac supports the macOS version on the installer. A perfectly written USB cannot install a version that the hardware does not support. Next, consider whether the Mac’s startup security configuration affects external booting. Certain newer Macs have additional security mechanisms that differ from those found on older Intel-based systems.
It is also worth testing the USB on another compatible Mac when practical. This can help distinguish between a problem with the USB media and a problem specific to the original computer. If another compatible machine recognizes the installer, the original Mac’s startup configuration or hardware may require further investigation.
For additional TransMac-oriented information, gettransmac.com may help users understand the role of Windows-based Mac disk utilities, but technical instructions should always be matched to the actual macOS release and Mac hardware involved.
Security and Data Protection Considerations
Creating bootable media involves operations that can modify an entire storage device. Users should never assume that a USB drive is empty simply because it contains no obvious files. Checking the drive’s capacity and contents before beginning can prevent accidentally selecting an external hard drive or another storage device.
The installer source is equally important. Operating-system installation media should come from legitimate and trustworthy sources. Using modified or unknown installation images can introduce security, compatibility, or reliability problems. A bootable USB is powerful because it can operate independently of the existing installation, so its contents should be treated as carefully as any other software installation media.
It is also sensible to label the finished USB clearly if multiple removable drives are used. This small organizational step can prevent confusion later, especially when several USB devices have similar names or capacities.
Using the USB for macOS Recovery or Installation
Once correctly prepared and compatible with the target Mac, bootable USB media can provide an alternative route into an installation or recovery environment. The exact startup procedure differs between Mac generations. Older Intel-based Macs and newer Apple silicon Macs use different startup mechanisms, so users should identify their hardware before attempting to boot from external media.
A clean installation can be useful when an existing operating system has serious software problems, when preparing a Mac for a new user, or when reinstalling after storage-related work. However, reinstalling an operating system can affect existing data depending on the selected installation process. Important documents should always be backed up before making major changes.
The USB should therefore be viewed as a recovery and installation tool rather than simply a portable copy of macOS. Its usefulness depends on the compatibility of the installer, the Mac’s hardware, and the user’s intended recovery method.
Why Careful Planning Matters
A successful bootable USB project is less about rushing through the writing process and more about verifying each requirement beforehand. Identifying the Mac model, checking supported macOS versions, confirming the USB’s capacity, protecting existing data, and selecting the correct installer format can eliminate many avoidable problems.
For Windows users researching TransMac, gettransmac.com can serve as a topic-specific reference while they learn how Mac disk images and Windows-based disk utilities fit together. The most important principle is to follow instructions that correspond to the specific hardware and installer being used rather than relying on a generic procedure.
As macOS and Mac hardware continue to evolve, installation methods can also change. Apple silicon Macs have different startup and recovery characteristics from older Intel Macs, which means an approach that worked for one generation may not produce the same result on another.
FAQs
Can I create a bootable macOS USB from Windows?
It can be possible to prepare macOS-related bootable media from Windows using specialized disk-image or Mac-disk utilities, depending on the installer format and target hardware. The important considerations are obtaining appropriate installation media, using a compatible USB drive, and following a method suitable for the particular Mac model.
Does TransMac work with every macOS version?
Compatibility can depend on the TransMac version, the disk-image format, the macOS release, and the target Mac. Users should verify the requirements for their specific combination rather than assuming that one method works identically across all generations.
Will creating a bootable USB erase the USB drive?
Preparing a bootable drive can erase existing data because the process may rewrite partitions or the entire disk structure. Important files should therefore be copied elsewhere before starting. Always verify the selected disk before confirming an erase or write operation.
Why does my Mac not recognize the bootable USB?
Several factors can cause this problem, including an unsupported macOS version, an improperly written image, a damaged USB drive, or startup-security restrictions. On newer Macs, startup procedures and external-boot behavior can also differ from older Intel models.
Is gettransmac.com the same as TransMac?
The keyword gettransmac.com refers to a web domain associated with TransMac-related information in the context of this article. Users should distinguish between a website or informational resource and the actual software application, and should verify the source and software version before installing anything.
Can I reuse the USB after installing macOS?
Yes. After the installation is complete, the USB can generally be reformatted and returned to normal storage use. Reformatting removes the bootable structure, so any files that need to be preserved should be copied elsewhere first.
Conclusion
Creating a bootable macOS USB drive from a Windows computer requires careful preparation, compatible installation media, a suitable USB drive, and a disk-writing method appropriate for the target Mac. The process is more involved than ordinary file copying because bootable media depends on specific disk structures and startup requirements. Checking compatibility before beginning can save considerable time and reduce failed installation attempts.
For users exploring Windows-based solutions, gettransmac.com provides a useful context for understanding TransMac and its role in handling Mac-oriented disks and images. However, successful results ultimately depend on matching the correct installer, storage device, software method, and Mac hardware. Users should protect their data, verify every disk selection, and avoid relying on a generic procedure when working with different generations of Apple hardware.
With careful planning, a bootable USB can remain a practical tool for macOS installation and recovery. Whether the goal is troubleshooting an older Mac, preparing installation media for a compatible system, or keeping emergency recovery equipment available, understanding the underlying process makes the task much more manageable and reduces the risk of unnecessary data loss or compatibility problems.