

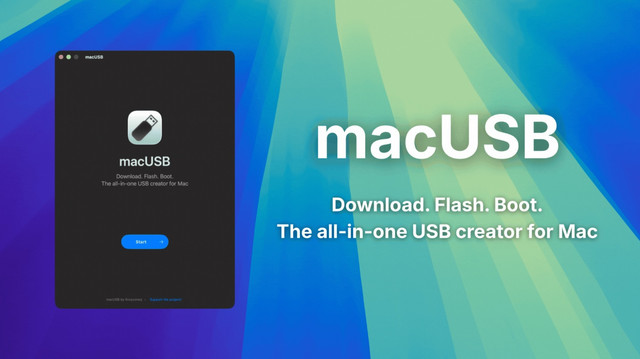

Creating a bootable macOS USB drive on a Windows computer may seem difficult at first, especially for users who do not own a Mac. Fortunately, GetTransMac makes the process much easier by allowing Windows users to access, format, and write macOS disk images without complicated commands. Whether you want to reinstall macOS, repair your Mac, or prepare a USB installer for future use, this software provides a practical solution.
Many beginners struggle to find a reliable method for handling macOS DMG files on Windows because most Windows tools are designed for ISO images instead. GetTransMac fills this gap by supporting Apple’s file system and making USB creation straightforward. With the right preparation and a compatible USB drive, users can create a bootable installer in just a few steps. This guide explains everything you need to know, from software features to installation, common mistakes, and troubleshooting tips.
Why Choose GetTransMac?
If you need to prepare a macOS installation USB from a Windows PC, choosing the right software is essential. GetTransMac is popular because it supports Apple-specific disk formats that Windows cannot normally read.
Unlike many general USB creation tools, it is specifically designed for macOS drives and DMG files. This saves time and reduces compatibility issues during installation. The software provides a simple interface that is suitable for beginners while still offering advanced disk management options for experienced users.
Some reasons users prefer it include:
- Supports DMG image files
- Creates bootable macOS USB drives
- Reads Mac-formatted disks
- Easy-to-use interface
- Works on modern Windows versions
These features make it one of the most convenient utilities for Mac-related storage tasks.
Key Features at a Glance
| Feature | Benefit |
|---|---|
| DMG Writing | Creates bootable macOS USB drives |
| Mac Disk Reader | Access HFS+ formatted drives |
| Disk Formatting | Prepare USB for installation |
| Simple Interface | Easy for beginners |
| Fast Processing | Saves time during USB creation |
| Windows Compatibility | Runs on multiple Windows versions |
The combination of these features makes GetTransMac useful for students, technicians, and home users who occasionally need to work with macOS installation media.
Preparing Before You Begin
Before creating a bootable USB, gather everything you need to avoid interruptions during the process. A little preparation can prevent installation errors later.

You should have a USB flash drive with at least 16GB of storage, although larger drives may provide better flexibility. Make sure to back up important files because formatting will erase all existing data. You also need a valid macOS DMG image that matches the version you intend to install. Running the software with administrator privileges is recommended since writing disk images requires elevated permissions.
It is also wise to temporarily disable unnecessary background applications that may interfere with USB writing. Ensuring the computer has a stable power supply prevents unexpected interruptions that could corrupt the installation media.
Installing the Software
Installing the application is a straightforward process that only takes a few minutes. After downloading the installer from the official source, launch the setup file and follow the installation wizard.
Accept the license agreement, choose the installation folder, and allow Windows to complete the installation. Once installed, launch the application as an administrator. Administrative privileges are important because the program needs direct access to storage devices.
After opening the software, connect your USB drive and confirm that Windows detects it correctly. You are now ready to begin creating your macOS installer.
Creating a Bootable macOS USB
The primary purpose of GetTransMac is creating bootable macOS USB drives on Windows. The process is simple if followed carefully.
First, insert the USB drive into your computer. Right-click the drive inside the software and choose the formatting option. After formatting is complete, select the option to restore the DMG image. Browse to your downloaded macOS DMG file and begin the writing process.
The writing operation may take anywhere from 20 to 60 minutes depending on your computer speed and USB performance. During this time, avoid disconnecting the USB drive or shutting down your computer.
When the process finishes successfully, safely eject the drive. Your macOS installation USB is now ready to use on a compatible Mac.
Common Problems and Solutions
Even reliable software can occasionally encounter issues. Understanding common problems makes troubleshooting much easier.
| Problem | Possible Solution |
|---|---|
| USB not detected | Reconnect or try another USB port |
| Permission error | Run as Administrator |
| Writing failed | Download a fresh DMG file |
| Slow writing speed | Use a USB 3.0 drive |
| Boot failure | Verify DMG compatibility |
Most issues are caused by corrupted downloads, incompatible USB drives, or insufficient permissions rather than software defects.
Best Practices for Better Results
Following a few best practices greatly improves the chances of creating a successful installer.
Always use a high-quality USB drive because cheaper drives often experience write failures. Keep sufficient free disk space on your Windows system to allow temporary files during processing. Download macOS images only from trusted sources to reduce the risk of corrupted files.
Additional recommendations include:
- Close unnecessary applications.
- Keep Windows updated.
- Avoid unplugging the USB.
- Verify the downloaded image.
- Use administrator mode.
These habits reduce installation errors and improve overall reliability.
Advantages Over Manual Methods
Many advanced users attempt to create bootable macOS USB drives using command-line utilities or complex scripts. While these methods can work, they often require technical knowledge and careful execution.
Using GetTransMac eliminates much of this complexity by providing a graphical interface where each step is clearly presented. Users do not need to memorize commands or manually configure partitions. Everything from formatting to writing the DMG image is handled through simple menu options.
This ease of use makes it an attractive choice for beginners, IT support professionals, and anyone looking for a faster workflow.
Safety Tips While Using the Software
Whenever working with storage devices, caution is important. Formatting operations permanently erase data, so always double-check the selected drive before proceeding.
Avoid interrupting the writing process because incomplete installation media may fail to boot. If using a laptop, connect the charger throughout the operation to prevent shutdown due to low battery.
It is also recommended to safely eject the USB after completion rather than simply unplugging it. This ensures all cached data has been properly written before removal.
Who Should Use GetTransMac?
The software is suitable for a wide variety of users. Beginners appreciate its simple interface, while experienced technicians value its ability to work with Apple file systems from Windows.
It is especially useful for:
- Students learning macOS installation
- Computer repair technicians
- IT administrators
- Home users
- Software testers
Anyone needing to prepare macOS installation media without access to another Mac can benefit from using GetTransMac.
Tips for Maintaining Your Bootable USB
Once your installer is ready, proper maintenance helps ensure it remains usable whenever needed. Store the USB in a safe location away from moisture, dust, and extreme temperatures. Label it clearly with the macOS version it contains to avoid confusion later.
Occasionally test the drive on compatible hardware to confirm it still boots correctly. If Apple releases a newer macOS version that you plan to use, recreate the installer with the updated image rather than relying on an outdated one. Keeping a backup copy of the original DMG file also makes it easier to recreate the installer if the USB becomes damaged or corrupted.
Conclusion
Creating a macOS bootable USB on Windows no longer requires advanced technical knowledge. GetTransMac offers a practical solution for reading Mac disks, writing DMG images, and preparing installation media through an intuitive interface. Its straightforward workflow makes it suitable for both beginners and experienced users, while its support for Apple file systems fills an important gap that standard Windows tools cannot address.
Read more: GetTransMac Bootable USB Guide