

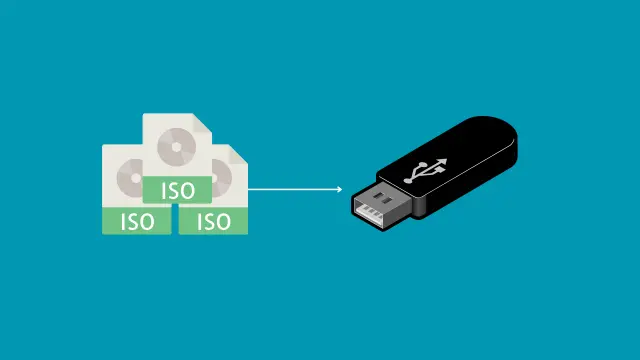

Creating a bootable macOS USB drive is essential when installing or reinstalling macOS on compatible hardware. While macOS users have built-in tools for this purpose, Windows users often require specialized software. GetTransMac provides a simple way to write macOS DMG files directly to a USB drive without needing access to a Mac computer. Whether you are repairing a Mac, preparing a fresh installation, or creating an emergency recovery drive, understanding the proper process helps avoid errors and saves time.
This guide explains every major step involved in creating a bootable USB with GetTransMac. It also covers system requirements, preparation tips, common mistakes, troubleshooting methods, and best practices. By following this guide carefully, beginners and experienced users alike can create reliable bootable media while minimizing the risk of corrupted installations.
What Is GetTransMac?
GetTransMac is a Windows application designed to read, write, and manage Mac-formatted drives. Since Windows cannot normally access HFS+, APFS, or macOS DMG images effectively, this software fills that gap by allowing users to interact with Apple file systems.
One of its most useful features is writing macOS DMG images directly to USB flash drives, making it possible to create bootable installation media entirely from Windows. The software is popular because of its simple interface and compatibility with many macOS versions.
Some of its primary functions include:
- Creating bootable macOS USB drives
- Opening Mac disk images
- Reading Mac-formatted drives
- Restoring DMG files to USB devices
- Managing Apple file systems on Windows
These capabilities make GetTransMac a practical solution for users who do not have immediate access to a Mac.
Why Create a Bootable macOS USB?
A bootable USB drive offers flexibility when maintaining or installing macOS. Instead of relying on internet recovery or another Mac, users can carry a portable installer that works whenever needed.

Common reasons include:
- Installing a fresh copy of macOS
- Upgrading an older Mac
- Repairing corrupted operating systems
- Recovering data after software failures
- Preparing multiple Mac computers
Having a bootable installer available can reduce downtime and simplify troubleshooting, especially when internet access is limited.
System Requirements
Before beginning the process, ensure your system meets the necessary requirements.
| Requirement | Details |
|---|---|
| Operating System | Windows 10 or Windows 11 |
| Software | GetTransMac |
| USB Drive | 16 GB or larger |
| DMG File | Valid macOS installer |
| Administrator Rights | Required |
| Storage Space | Enough for installer files |
Meeting these requirements helps ensure the process completes successfully without unexpected interruptions.
Preparing Before You Start
Preparation is one of the most important parts of creating bootable media. A few simple checks beforehand can prevent installation failures later.
First, verify that the downloaded macOS DMG file is complete and free from corruption. Damaged files often cause write failures or boot errors.
Second, use a high-quality USB flash drive. Older or defective drives may experience write errors or reduced reliability during installation.
Third, back up all important files stored on the USB device because formatting removes every existing file.
Finally, close unnecessary Windows applications before running GetTransMac. This reduces system load and minimizes the chance of interruptions while writing the disk image.
Step-by-Step Guide to Create a Bootable USB
Creating bootable media is straightforward when following the correct sequence.
Step 1: Install the Software
Download and install GetTransMac on your Windows computer. Launch it with administrator privileges to ensure full access to disk-writing features.
Step 2: Connect the USB Drive
Insert a USB drive with sufficient storage capacity. Make sure there are no files you need because the drive will be completely erased.
Step 3: Format the Drive
Within the software, choose the option to format the USB for Mac compatibility. Wait until formatting finishes before proceeding.
Step 4: Restore the Disk Image
Locate the macOS DMG installer and select the restore option. The software begins copying all required installation files to the USB drive.
Step 5: Wait for Completion
Depending on USB speed and file size, the writing process may require several minutes. Avoid disconnecting the drive during this stage.
Step 6: Safely Remove the USB
Once the operation completes successfully, safely eject the USB drive. It is now ready for use on compatible Mac systems.
Tips for Faster Performance
Several factors affect writing speed and overall reliability.
Helpful recommendations include:
- Use USB 3.0 or newer flash drives.
- Connect directly to the motherboard USB port.
- Avoid running large applications simultaneously.
- Keep sufficient free disk space on Windows.
- Verify the DMG file before writing.
Following these practices helps complete the process more efficiently while reducing write errors.
Common Errors and Their Solutions
Users occasionally encounter issues while creating bootable media. Fortunately, most problems have simple solutions.
| Problem | Possible Cause | Solution |
|---|---|---|
| USB not detected | Faulty port | Try another USB port |
| Write failed | Damaged DMG | Download a new image |
| Access denied | Missing permissions | Run as Administrator |
| Boot failure | Incorrect image | Verify installer version |
| Slow writing | Old USB drive | Use USB 3.0 storage |
Understanding these common issues helps users quickly recover without restarting the entire process.
Advantages of Using GetTransMac
Many Windows users choose GetTransMac because it simplifies tasks that would otherwise require a Mac computer.
Its advantages include:
- Beginner-friendly interface
- Quick DMG writing process
- Supports multiple macOS versions
- Reads Mac-formatted drives
- Works entirely on Windows
- Reliable restoration process
- Easy navigation
These features make it a preferred utility for creating macOS installation media from Windows systems.
Best Practices for Reliable Bootable Media
Creating a bootable USB is only part of the process. Ensuring long-term reliability requires proper handling and maintenance.

Always store the USB in a safe location after creation to prevent accidental damage. Avoid using the same USB drive for everyday file transfers because modifying the installer contents may corrupt the bootable structure.
Label the USB with the macOS version so it can be easily identified later. If newer macOS releases become available, consider creating an updated installer rather than relying on outdated installation files.
Periodically test the USB on compatible hardware to confirm that it still boots correctly. Regular verification ensures the installer remains functional when needed most.
Mistakes to Avoid
Many installation problems occur because of avoidable mistakes.
Avoid the following:
- Disconnecting the USB during writing
- Using damaged flash drives
- Downloading incomplete DMG files
- Ignoring administrator permissions
- Interrupting formatting
- Running disk cleanup during writing
Careful attention to these details significantly improves success rates.
Conclusion
Creating a macOS installer from Windows no longer requires complicated methods or access to another Mac. GetTransMac provides a practical solution for writing macOS DMG images directly to USB drives, allowing users to prepare installation media with minimal effort. By carefully preparing the USB, verifying installer files, following the correct writing procedure, and avoiding common mistakes, users can create dependable bootable media suitable for installation, recovery, and maintenance tasks.
Read more: GetTransMac Tips and Tricks for Better Mac Drive Management