


Managing Mac-formatted drives on a Windows computer can be challenging because Windows does not natively support Apple’s HFS+ and APFS file systems. This is where GetTransMac becomes a practical solution. It allows Windows users to access, manage, and create Mac-compatible storage devices without owning a Mac. Whether you need to transfer files, create a bootable macOS USB drive, or browse a Mac hard drive, this software simplifies the process.
This complete setup guide explains everything from downloading and installing the software to configuring it for daily use. Even if you have never used the program before, the setup process is straightforward when followed step by step. By the end of this guide, you will understand how to install the software correctly, configure important settings, and use its primary features efficiently while avoiding common mistakes.
What is GetTransMac?
GetTransMac is a Windows utility designed to read, write, and manage Mac-formatted disks. Unlike Windows File Explorer, which cannot normally access HFS+ drives, this software bridges the compatibility gap between Windows and macOS storage formats.
The application is widely used for creating bootable macOS USB drives, recovering files from Mac disks, and transferring data between Windows and Mac systems. It supports multiple storage devices, including USB flash drives, external hard disks, SSDs, and disk image files.
Main Features
- Read Mac-formatted drives
- Copy files between Windows and Mac storage
- Create bootable macOS USB installers
- Open DMG image files
- Format Mac-compatible drives
- Simple Windows interface
System Requirements
Before installing the software, verify that your computer meets the minimum requirements.
| Requirement | Details |
|---|---|
| Operating System | Windows 10 or Windows 11 |
| Processor | Intel or AMD Dual-Core |
| RAM | 4 GB minimum |
| Storage | At least 200 MB free |
| USB Drive | 16 GB or larger for macOS installer |
| Administrator Rights | Required during installation |
Meeting these requirements ensures smooth installation and reliable performance.
Downloading and Installing the Software
Installing GetTransMac is a simple process that usually takes only a few minutes. Begin by downloading the installation package from a trusted source. Save the installer in an easily accessible folder before starting the setup.
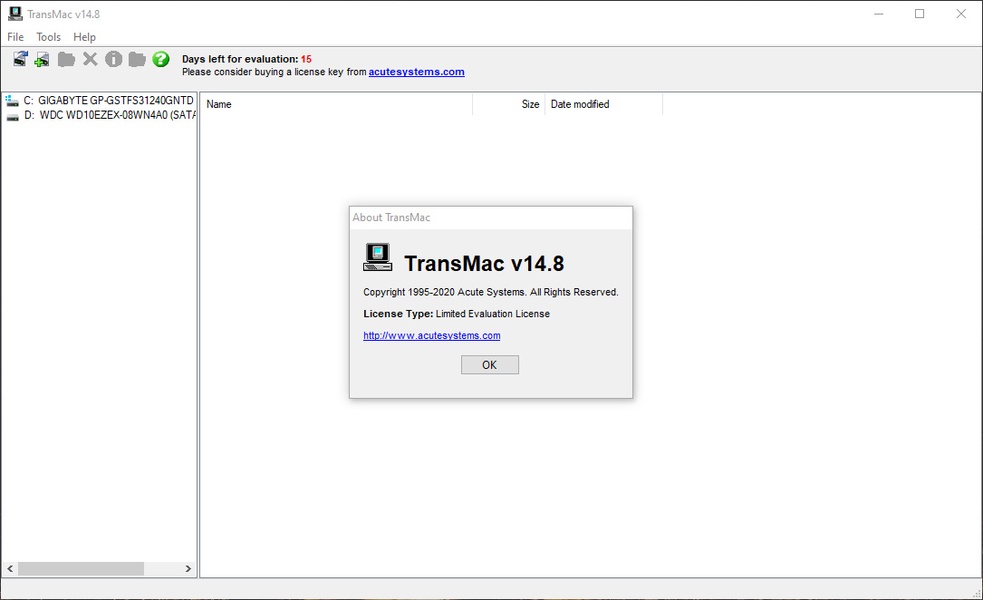

Right-click the installer and choose Run as Administrator. Administrator privileges are important because the software requires low-level access to storage devices. Follow the installation wizard by accepting the license agreement, selecting an installation location, and completing the setup. After installation, restart your computer if prompted. Once Windows loads again, launch the application from the desktop shortcut or Start menu.
The first launch may take a few seconds because the software scans connected storage devices. This is completely normal and only happens briefly during startup.
Initial Setup Process
After installation, the first configuration is very straightforward. Open the application using administrator privileges to ensure all storage devices are detected correctly.
The program automatically displays connected disks in the left navigation panel. Internal drives, USB drives, and external storage devices appear in a structured list. If a Mac-formatted drive is connected, the software attempts to detect its partitions automatically.
During initial setup, avoid making changes to important drives until you have confirmed the correct disk selection. Accidentally formatting or restoring the wrong drive could result in data loss.
It is also recommended to close unnecessary applications while working with storage devices. This helps reduce conflicts and improves overall performance during file transfers or bootable USB creation.
Understanding the Interface
The interface is designed with simplicity in mind. Most options are located in the top toolbar and context menus.
Main Sections
| Section | Purpose |
|---|---|
| Left Panel | Lists all connected storage devices |
| Right Panel | Displays folders and files |
| Toolbar | Accesses major functions |
| Status Bar | Shows progress and disk information |
Even beginners can quickly become comfortable with the layout because everything is organized logically.
Creating a Bootable macOS USB
One of the most popular reasons people install GetTransMac is to create a bootable macOS installer.
Before beginning, prepare a USB drive with at least 16 GB of storage and obtain the correct macOS DMG file.
General steps include:
- Insert the USB drive.
- Open the software as Administrator.
- Select the USB drive.
- Format the drive if necessary.
- Choose the Restore option.
- Select the macOS DMG image.
- Start the restoration process.
- Wait until completion.
Depending on your USB speed and computer hardware, this process may take between 20 and 60 minutes.
Accessing Mac Drives in Windows
Another valuable feature is the ability to browse Mac-formatted drives directly from Windows. Once connected, supported partitions appear in the software interface. Users can open folders, copy files, and inspect directory structures without needing a Mac computer.
When copying large files, patience is important because transfer speed depends on the storage device and USB connection. Using USB 3.0 or faster ports significantly improves performance.
The software also preserves the original folder structure during file transfers, making it easier to organize documents, media, and project files.
Best Setup Practices
Following a few best practices helps maintain stable performance and reduces the chance of errors.
- Always launch the program as Administrator.
- Safely eject USB drives after use.
- Verify the selected drive before formatting.
- Keep sufficient free disk space.
- Close unnecessary background programs.
- Use high-quality USB flash drives.
- Back up important files before major operations.
These simple habits help ensure a smoother experience and minimize the risk of accidental data loss.
Advanced Setup Options
After completing the basic installation, you can customize the software for better performance. Advanced settings are useful for users who frequently work with Mac-formatted drives or create bootable USB installers. Before making changes, ensure no file transfers are in progress to prevent interruptions.
You can adjust how the application detects connected drives, refreshes storage devices, and handles disk images. While the default settings are suitable for most users, experienced users may prefer customizing options to match their workflow. It is also recommended to keep the software updated whenever a newer version becomes available. Updated versions often include performance improvements, compatibility updates, and bug fixes that enhance reliability.
Common Setup Errors and Solutions
Although the installation process is usually smooth, some users may encounter issues during setup or while accessing storage devices. Most problems are easy to resolve with a few troubleshooting steps.
| Problem | Possible Cause | Solution |
|---|---|---|
| USB drive not detected | Loose connection | Reconnect the drive |
| Permission error | No administrator access | Run the program as Administrator |
| Restore process fails | Corrupted DMG file | Download a fresh image |
| Drive cannot be opened | Unsupported file system | Verify the disk format |
| Slow transfer speed | USB 2.0 connection | Use a USB 3.0 or faster port |
Restarting both the software and your computer can also resolve many temporary issues.
Performance Optimization Tips
To get the best experience from GetTransMac, keep your computer optimized and avoid unnecessary background activity during large file transfers. Performance depends on your hardware, storage device, and USB interface.
Here are a few practical tips:
- Use SSDs or high-speed USB flash drives.
- Connect storage devices directly to the computer.
- Avoid unplugging drives during operations.
- Close heavy applications while transferring files.
- Keep sufficient free storage on your system drive.
- Restart your PC occasionally for improved stability.
These simple practices can improve transfer speeds and reduce the chance of errors.
Safety Tips While Using GetTransMac
Since GetTransMac works directly with storage devices, it is important to use it carefully. Always verify the selected drive before formatting or restoring an image. Choosing the wrong disk could erase valuable data.
Back up important files before making significant changes to any storage device. If you are creating a bootable USB installer, ensure the USB drive contains no important files because the formatting process removes all existing data. Safely eject removable drives after completing your work to prevent file corruption.
Using these precautions will help maintain data integrity and make your overall experience safer.
Advantages and Limitations
Understanding both the strengths and limitations of the software helps set realistic expectations.
Advantages
- Easy installation process
- Beginner-friendly interface
- Supports Mac-formatted drives
- Creates bootable macOS USB installers
- Reads DMG image files
- Lightweight and responsive
Limitations
- Requires administrator privileges
- Some operations can take time on slower USB drives
- Incorrect drive selection may result in data loss
- Windows compatibility depends on supported file systems
Conclusion
This complete setup guide has covered everything from installation and initial configuration to advanced settings, troubleshooting, optimization, and safety practices. Learning these steps helps you avoid common mistakes while improving efficiency when working with Mac storage devices. As long as you follow the recommended practices and maintain regular backups, GetTransMac will remain a reliable tool for accessing, managing, and creating Mac-compatible drives on Windows systems.
Read more: GetTransMac for Windows Beginners